Download Cwm Custom Recovery For At&T Galaxy S3 2018 UPDATED
Download Cwm Custom Recovery For At&T Galaxy S3 2018
Custom Recovery is a modified kind of recovery that allows y'all to perform several extra tasks. TWRP recovery and CWM are the virtually normally used custom recoveries. Good custom recovery comes with several merits. It let you back up the entire phone, load custom ROM including lineage Bone, and install flexible zips. This is especially because the Android telephone manufacturer's pre-installed recovery does non back up flashing Zips but are stock-based. To add to this, a custom recovery will allow you to root your device.
Custom Recovery: TWRP VS CWM
Using Official TWRP App to install TWRP Recovery
Using ROM manager to install CWM Recovery
Custom Recovery: TWRP VS CWM
Nosotros become to explore the main differences betwixt TWRP and CWM.
Team Win Recovery Projection (TWRP) is characterized with a make clean interface with big buttons and graphics are friendly to user. Information technology supports touch response and has more options on homepage than CWM.

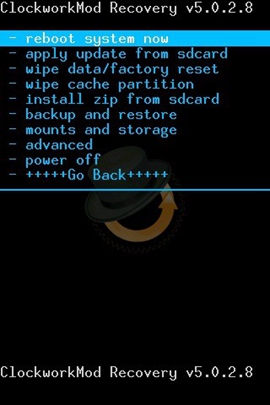
On the other hand, Clockwise Mode Recovery (CWM), navigates using hardware buttons (Volume buttons and Power button). Different the TRWP, CWM does non back up affect response and information technology has bottom options on homepage.
Using Official TWRP App to install TWRP Recovery
Note: To apply this method, your phone must be rooted and your bootloader must be unlocked.
Step 1. Install the official TWRP App
Outset get to Google Play store and install the official TRWP App. This app will help y'all install TRWP on your phone.
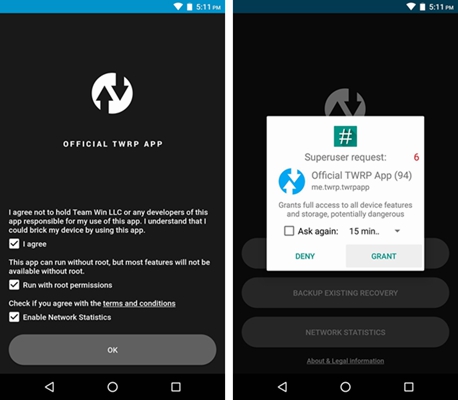
Step 2. Take terms and of service
To accept the terms of service, tick on all the three checkboxes. You will then press OK.
At this point, TWRP will enquire for root access. On the superuser popular upwards, press grant.
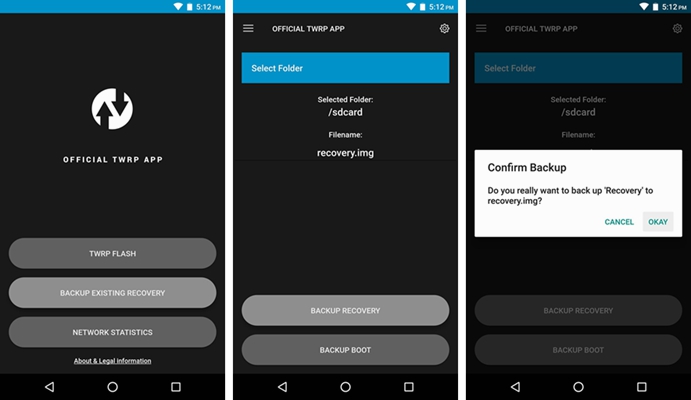
Step 3. Recovery back up
If you desire to revert to stock recovery or receive OTA organisation update in future, you'd ameliorate create a fill-in of your existing recovery prototype before installing TWRP. To dorsum up current recovery, tap 'Fill-in Existing Recovery' on main menu, and so press OK.
Step four. Downloading TWRP image
To download the TWRP image, go to TWRP's app's main menu, tap 'TWRP Flash', then, tap on 'Select Device' on the screen that follows, then choose your model from the list from there select the latest TWRP for download, which is going to be popular ane in the list. Download by tapping on the main down load link, close to page top. When you are done, printing back button to go back to the TWRP app.
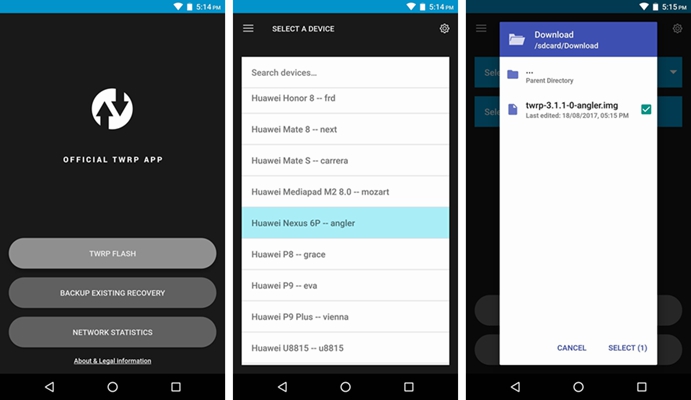
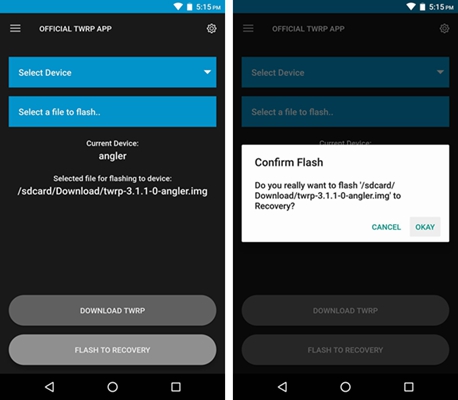
Step five. Installing TWRP
To install TWRP, tap select a file to flash on the TWRP flash menu. On the carte du jour that appears, select TRWP img file so tap the 'select' button. Y'all are now set to install TWRP. Tap 'wink to recovery' at the bottom screen. This takes virtually half an hour and you are washed! Y'all just completed installing TRWP.
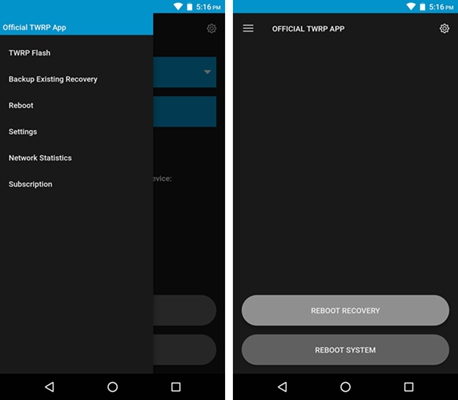
Step six. Making TWRP your all-time recovery
You are finally getting there. At this point, you want to make TWRP your permanent recovery. To prevent Android from overwriting TRWP, you have to make it your permanent recovery. In order to make TRWP your permanent recovery, go to the TRWP app's side navigation and select 'Reboot' from side navigation carte. On the screen that follows, press 'Reboot Recovery', and then swipe the slider that says 'Swipe to Allow modifications'. And at that place you are done, All washed!
Note: It is worth keeping in mind that yous demand to create full Android dorsum up before yous are off to flash ZIPs and custom ROMs every bit this covers you if anything goes amiss in future
Using ROM director to install CWM Recovery
Notation: To use this method, your telephone must be rooted and your bootloader must be unlocked.
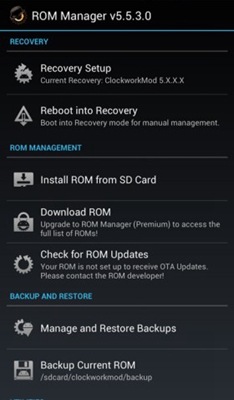
Stride 1. Go to Google Play store and install ROM Managing director on your Android device then Run it.
Pace 2. From the ROM director apps opt for 'Recovery Prepare'.
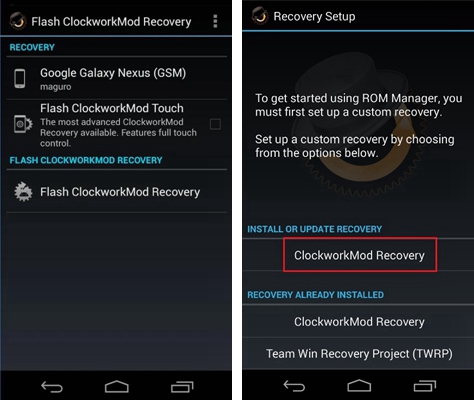
Stride iii. Tap clockwork mod recovery under 'install and update'.
Stride 4. Let the app identify your phone model. Kindly annotation that this may take a few minutes. After the identification is washed, tap on the app where it correctly shows the right model of your phone.
Though your telephone is likely to recommend a Wi-Fi connection, a mobile network connection will piece of work well. This is considering clockwork modernistic recovery is well-nigh 7-8MB. From here henceforth, click OK equally you proceed.
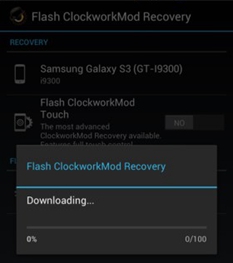
Step 5. To get the app to start downloading the clockwork modernistic recovery, tap on the 'Flash ClockworkMod Recovery'. Information technology volition download in a few seconds and automatically install the app on your phone.
Step 6. This is finally the last step! Confirm if the clockwork modernistic is installed on your phone.
Later confirming, go back to homepage of ROM manager and tap on "Reboot into Recovery". This volition prompt your telephone to reboot and get activated into clockwork modern recovery.
Conclusion
In that location yous have it your Android phone is completely installed with the new clockwork way recovery. 6 simple steps that take very minimal of your fourth dimension, and the task is completed, all having done by yourself. A kind of guided 'cocky service' installation. Having completed this task, it is at present time to install a custom Android ROM and take pleasure in using your phone.
DOWNLOAD HERE
Posted by: colemanshorme.blogspot.com

